Showing posts with label photography. Show all posts

6.18.2010

The "Lenz Friendz"

So I know you are wondering, what exactly are Lenz Friendz??

Well, here they are!!


They're eye-catching friends for your camera lens!

cute, fun, fascinating, and irresistible!

Where did Lenz Friendz come from?

Well, after a little research online I've realized that I can't take all of the credit because there are a few similar products, but I'll tell you where my inspiration came from. It's all from...
This. Little. Toy.


My 5 month old son, Anson, loves this adorable little tiger, so eventually I just started putting it around anything and everything I could think of to keep him happy. His wrist, the jumperoo, his pack-n-play mobile, pretty much everywhere! One day, he was propped up on the couch with his sister for some pictures, and although he's usually a laughable, fun, personality-filled baby boy, the best pictures I could possibly get of him all looked like this:


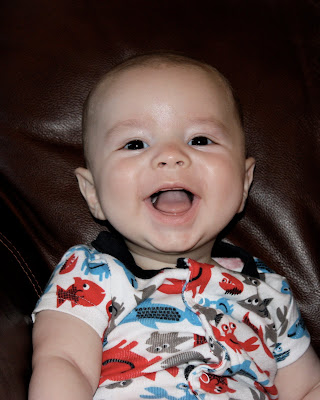
Then I saw his tiger toy across the room, so I grabbed it and started waving it in the air to make him smile. His eyes followed the tiger's every movement, so I kept trying to get it close enough to the camera to get a straight-on shot without blocking my view. Then it hit me, DUH! I can just wrap this around my camera lens like I wrap it around everything else! And suddenly, I started getting pictures like THIS one:


And so the Lenz Friendz idea was born! I think they are a great way to catch a baby or toddler's attention, not to mention they make your camera look fun and funky! I hope you all enjoy this exciting new product, and make sure to spread the word to all of your friends!

Want one for youself? You can buy one HERE at my Etsy shop! Or become a blog follower and stay tuned to enter a giveaway! Once my blog gets 30 followers, I will be hosting a Lenz Friendz giveaway of your choice!

6.16.2010

Tutorial : Turn a photo into a coloring sheet with Photoshop

Keep reading to learn how to convert an ordinary photo into a coloring sheet like this one!


How do all birthdays and holidays ALWAYS sneak up so fast?

I just realized today that my father-in-law's birthday AND father's day are coming up, and to mail it in time I pretty much needed to mail it, well, today. I always like to include something made by my kids, which can be a little difficult with a two year old and 5 month old. I usually make something involving painted handprints or fingerprints, but I wanted to try something a little different this time, especially since I was so short on time. So I thought... maybe I'll just have Millie color something, so I googled "grandpa coloring sheets" and all I could find were a bunch of pictures of balding old men. My father-in-law might find that a little offensive since he still has a full head of hair, he might think I'm trying to call him old! Then I suddenly remembered playing around in photoshop several months ago and discovering all of the fun and exciting filters. After a lot of trial and error, I finally figured out how to turn a photo into a coloring sheet using photoshop. As an afterthought, I'm sure I could have just googled it and found detailed instructions within seconds, but it's too late for that now!

Instructions:

Find or take a digital photograph with a simple background (most of mine were either a bare wall or a solid couch) with very few shadows on your subject's face.

Open the photo in photoshop and resize it to fit whatever size you're wanting to print (my coloring pages are all 8 1/2 x 11)

Go to Filter ->Sketch->Photocopy and adjust the detail and darkness settings to your liking. I kept most of mine both around 7. And don't worry, if you're not liking how it looks, remember we're not finished yet!

Click Layer->New Adjustment Layer->Levels
In the Adjustments tab under Levels, slide the arrows to adjust the different levels. There should be something that looks kind of like a graph, with three arrows underneath. The left arrow can be used to increase the shadow levels, this will give you darker, thicker lines. The right arrow can be used to decrease the highlight levels, which will clean up some of the noise in your picture. Play around with the levels until you're satisfied.

If you're a perfectionist like me, and want to clean up some of the background and a few splotchy areas, then just make sure that your photo layer is selected (not the level adjustments layer) and use a white brush to color over some of that unwanted noise.

Ta-da! You are finished! Hopefully your kids will have lots of fun coloring pictures of themselves, I know my daughter will!


Related Posts with Thumbnails